If you’ve ever bitten into a dessert that’s simultaneously fluffy, moist, and bursting with flavor, you know the magic of a perfectly baked cake. The Strawberry Red Velvet Layer Cake is that kind of show-stopper. Imagine layers of vibrant red cake, lightly sweetened cream cheese frosting, and the subtle fruity tang of fresh strawberries in every bite. It’s a feast for the eyes and the palate! Fun fact: the “red velvet” name dates back to the early 20th century when the combination of cocoa, vinegar, and buttermilk created a tender, slightly tangy cake that wowed dessert lovers.
What makes this Strawberry Red Velvet Layer Cake special is its balance between elegance and simplicity. While it looks bakery-worthy, it’s surprisingly quick and easy to make, perfect for family gatherings or a special treat. Compared to a classic chocolate layer cake on our blog, this recipe stands out with its vibrant color and strawberry twist, offering a fresh and festive option. By the end of this post, you’ll be ready to impress your friends and family with this irresistible dessert!
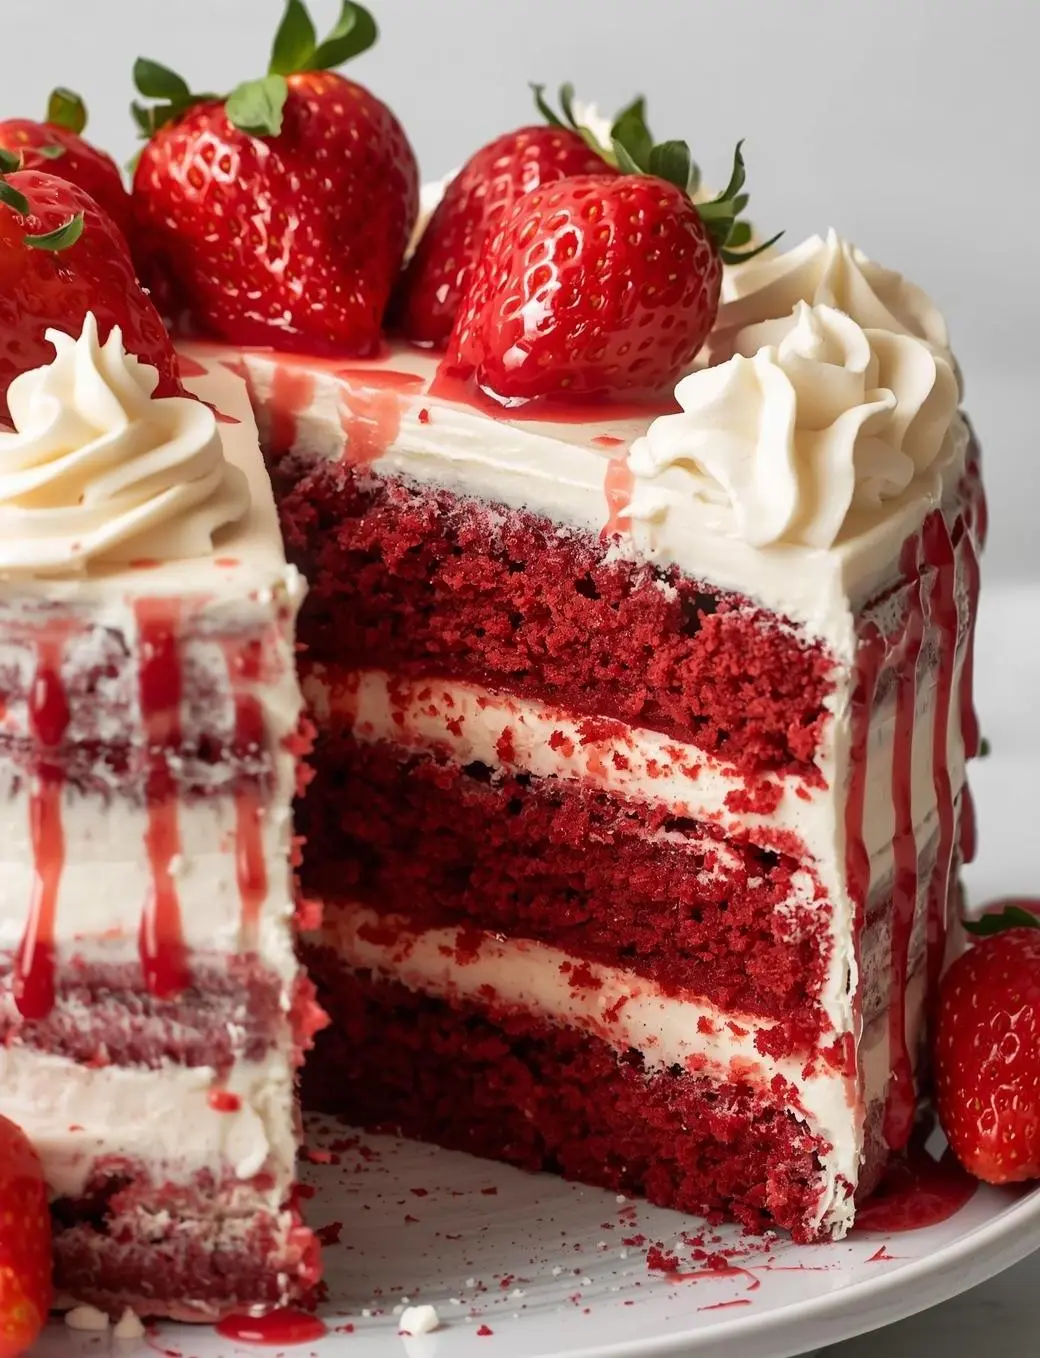
What is Strawberry Red Velvet Layer Cake?
Ever wondered why it’s called a “Red Velvet” cake? Is it the luxurious color, the velvety texture, or just a clever marketing trick? The Strawberry Red Velvet Layer Cake takes this classic concept to a whole new level with the addition of fresh strawberry flavor, making it a dessert that’s as playful as it is indulgent. A little anecdote: one baker joked that “the way to a man’s heart is through his stomach,” but in this case, the way to anyone’s heart is through this cake! Its layers, creamy frosting, and fruity punch make it an irresistible showstopper. Give it a try and see why this dessert deserves a permanent spot in your recipe collection.
Why You’ll Love This Strawberry Red Velvet Layer Cake
1. Show-Stopping Flavor: Each layer combines tender red velvet cake with sweet, tangy cream cheese frosting and juicy strawberries, creating a perfect harmony of taste.
2. Cost-Effective Home Baking: Making this cake at home is easier and cheaper than buying a bakery version, and you get to control the quality of every ingredient.
3. Stunning Presentation: The bright red layers and creamy frosting not only taste amazing but look gorgeous on the table.
If you enjoyed our Chocolate Overload Drip Cake or Yellow Velvet Cake Recipe, you’ll love how this recipe balances sweetness with a fresh fruity twist. It’s perfect for birthdays, anniversaries, or just because you deserve something special. Try it today and enjoy a bakery-worthy cake without leaving home!
How to Make Strawberry Red Velvet Layer Cake
Quick Overview
This cake is surprisingly simple to make. The layers bake in under 30 minutes, while the cream cheese frosting is whipped to perfection in just 10. Its velvety texture and strawberry infusion make it a favorite for dessert lovers of all ages. Total prep and bake time is roughly 1.5 hours.
Key Ingredients for Strawberry Red Velvet Layer Cake
- 2 ½ cups all-purpose flour
- 1 ½ cups granulated sugar
- 1 tsp baking soda
- 1 tsp cocoa powder
- 1 tsp salt
- 1 cup vegetable oil
- 1 cup buttermilk
- 2 large eggs
- 2 tsp vanilla extract
- 2 tsp red food coloring
- 1 tsp white vinegar
- 8 oz cream cheese, softened
- ½ cup unsalted butter, softened
- 4 cups powdered sugar
- 1 tsp vanilla extract
- 1 ½ cups fresh strawberries, chopped
Step-by-Step Instructions
- Preheat your oven to 350°F (175°C). Grease and line two 8-inch cake pans.
- In a large bowl, whisk together flour, sugar, cocoa powder, baking soda, and salt.
- In another bowl, combine oil, buttermilk, eggs, vanilla, red food coloring, and vinegar. Mix well.
- Gradually add dry ingredients to wet ingredients, stirring until smooth.
- Divide batter evenly between prepared pans and bake 25–30 minutes. Test with a toothpick.
- Allow cakes to cool completely before frosting.
- For frosting: Beat cream cheese and butter until creamy. Gradually add powdered sugar and vanilla.
- Layer cake with frosting and chopped strawberries between layers. Frost the top and sides.
- Decorate with extra strawberries for a stunning finish.
What to Serve Strawberry Red Velvet Layer Cake With
- Fresh strawberry slices on the side
- A dollop of whipped cream
- A scoop of vanilla ice cream
- Hot coffee or tea to balance the sweetness
Top Tips for Perfecting Strawberry Red Velvet Layer Cake
- Even Layers: Use a serrated knife to level cake layers before frosting.
- Strawberry Prep: Pat strawberries dry to prevent frosting from getting watery.
- Room Temperature Ingredients: Ensure butter and cream cheese are soft for smooth frosting.
- Baking Check: Don’t overbake; cake should spring back lightly when touched.
- Storage: Cover with a cake dome to keep moist if serving the next day.
Storing and Reheating Tips
- Refrigeration: Store in an airtight container for up to 3 days.
- Freezing: Wrap slices in plastic wrap and foil; freeze up to 1 month.
- Serving: Let refrigerated cake sit at room temperature for 20 minutes before serving for best texture.
FAQ
Q: Can I use frozen strawberries?
A: Yes, but thaw and drain them first to avoid excess moisture.
Q: Can I make this cake without red food coloring?
A: Absolutely! The cake will have a natural pink hue with strawberries.
Q: Can I use a different frosting?
A: Cream cheese frosting works best, but whipped ganache or buttercream are great alternatives.
Q: How do I prevent the layers from crumbling?
A: Chill the cakes slightly before slicing and frosting; this keeps them stable.
The Strawberry Red Velvet Layer Cake is more than a dessert—it’s a celebration in every slice. With its vibrant layers, luscious frosting, and fresh strawberry goodness, it’s perfect for birthdays, holidays, or any occasion that calls for a special treat. By following these simple tips, you can create a cake that’s both stunning and delicious. So grab your mixing bowls, preheat the oven, and get ready to impress your friends and family with this delightful homemade masterpiece. Your next dessert will never look or taste the same!
3 thoughts on “Strawberry Red Velvet Layer Cake: 5 Tips for Perfect Layers”