
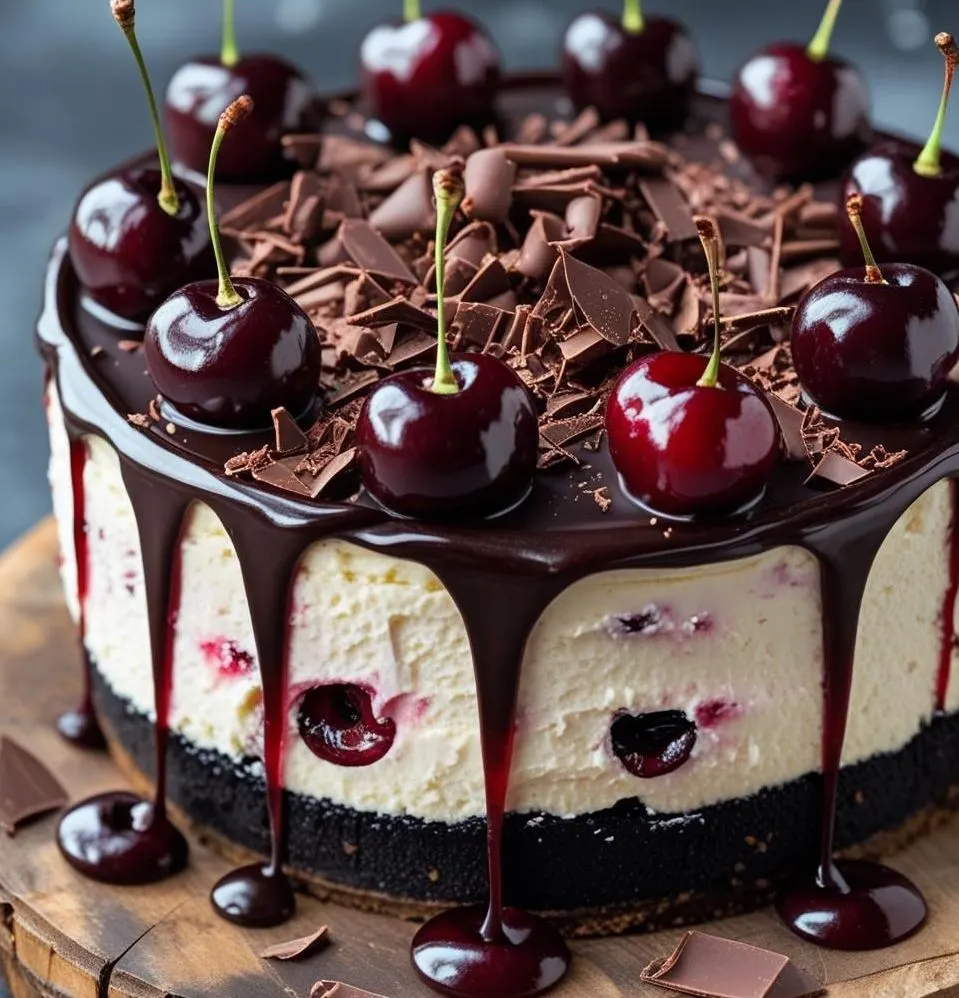
Creamy, decadent, velvety, and bursting with sweet dark cherries and rich chocolate ganache, this magnificent dessert is guaranteed to steal the show at any dinner table! There is something truly enchanting about cutting into a silky smooth chocolate cream cheese filling topped with juicy cherries. Fun fact: the iconic German Black Forest dessert tradition takes its name not directly from the dense trees, but from Schwarzwälder Kirschwasser, a distinct cherry specialty liquor distilled in the Black Forest mountain region!
If you are looking for a showstopping dessert that delivers total bakery elegance without complicated techniques, this homemade Black Forest Cheesecake is an absolute must-try. Preparing this impressive cake at home requires simple ingredients, taking just twenty minutes of active prep time before baking into pure velvety perfection. Kids love the rich chocolate cookie crust, while adults appreciate the sophisticated pairing of dark cocoa and tart fruit. If you loved our reader-favorite chocolate cherry roll cake or Black Forest Chocolate Swiss Roll Cake, this ultra-creamy, baked cheesecake variation will take your dessert game to even higher heights. Grab your springform pan, preheat your oven, and let’s bake a truly decadent slice of chocolate heaven together!
What is Black Forest Cheesecake?
Why do we call this luscious chocolate dessert Black Forest anyway? Is it because the dark chocolate curls resemble a misty forest floor, or because the sweet cherry topping brings a bright burst of magic to every slice? The name Black Forest Cheesecake simply refers to a legendary combination of deep cocoa, velvety cream cheese, and sweet dark cherries! My fondest childhood memories involve watching my aunt bake this exact cake for family holidays, always reminding us of that classic saying: the way to a man’s heart is through his stomach. Seeing my uncle ask for a second slice before dinner even ended proved her right! Ready to recreate that same sweet magic in your kitchen? Preheat your oven and let’s start baking!
Why You’ll Love This Creamy Chocolate Cherry Bake
- Silky Chocolate Filling: The main highlight of this recipe is the ultra-smooth, velvety cream cheese filling infused with real melted chocolate and natural cocoa powder for deep flavor.
- Budget-Friendly Luxury: Ordering custom specialty cakes from high-end bakeries can break the bank, but baking a homemade Black Forest Cheesecake costs just a fraction of the price using basic pantry items.
- Irresistible Toppings: A glossy layer of dark chocolate ganache, sweet cherry pie topping, and airy whipped cream piping create an unforgettable sensory experience in every single bite.
Much like our popular chocolate velvet Swiss roll, this recipe offers a striking presentation with easy, foolproof instructions. Gather your baking supplies and try making this delicious dessert at home today!
How to Make Black Forest Cheesecake
Quick Overview
This approachable cheesecake recipe makes high-end baking simple and stress-free. By pairing a crunchy chocolate cookie crust with a rich, baked cream cheese batter and a sweet cherry topping, you achieve the perfect balance of textures and flavors. With only 20 minutes of active prep time and simple step-by-step assembly, you can prepare an unforgettable cake for any holiday or party.
Key Ingredients
- Chocolate Sandwich Cookies: 2 cups crushed cookie crumbs (like Oreos) for the crust.
- Unsalted Butter: 5 tablespoons melted unsalted butter.
- Cream Cheese: 24 ounces (3 full blocks) full-fat cream cheese, softened to room temperature.
- Granulated Sugar: 1 cup fine white sugar for perfect sweetness.
- Unsweetened Cocoa Powder: ⅓ cup high-quality Dutch-process cocoa powder.
- Semi-Sweet Chocolate: 4 ounces melted semi-sweet chocolate, slightly cooled.
- Sour Cream: ½ cup full-fat sour cream at room temperature for maximum creaminess.
- Pure Vanilla Extract: 1 teaspoon pure vanilla extract.
- Large Eggs: 3 large eggs at room temperature.
- Cherry Topping: 1 can (21 ounces) sweet dark cherry pie filling (or homemade cherry compote).
- Whipped Cream & Chocolate Curls: 1 cup heavy whipped cream and dark chocolate curls for decoration.
Step-by-Step Instructions
- Prepare the Crust: Preheat your oven to 325°F (165°C). Lightly grease a 9-inch springform pan. In a medium bowl, combine 2 cups chocolate cookie crumbs and 5 tablespoons melted butter. Press the mixture firmly into the bottom of the prepared pan. Bake the crust for 8 to 10 minutes, then remove and set aside to cool while making the filling.
- Mix the Creamy Filling: In a large mixing bowl, beat 24 ounces softened cream cheese and 1 cup sugar on medium speed until smooth and creamy. Mix in ⅓ cup cocoa powder, 4 ounces melted chocolate, ½ cup sour cream, and 1 teaspoon vanilla until fully blended. Add 3 eggs one at a time, mixing on low speed just until combined (avoid overmixing after adding eggs to prevent cracking!).
- Bake, Chill, and Decorate: Pour the smooth chocolate batter over the crust. Bake for 55 to 60 minutes, or until the edges are set and the center slightly jiggles. Turn off the oven, crack the door open, and let the cake cool inside for 1 hour. Refrigerate for at least 6 hours (preferably overnight). Once chilled, spread the cherry filling over the top, pipe whipped cream around the border, and sprinkle with dark chocolate curls before serving.
What to Serve With This Decadent Cherry Dessert
Pair your rich slice of chocolate cheesecake with these complementary sides and beverages:
- Hot Beverages: Serve with a freshly brewed cup of dark roast espresso, a hot cappuccino, or a mug of black tea to balance the sweet richness.
- Fresh Berries: Offer extra sweet cherries, fresh red raspberries, or sliced strawberries on the side for a bright, fruity contrast.
- Dessert Liquors: Pair adult servings with a small glass of cherry kirsch, amaretto, or dark chocolate dessert wine.
- Cold Drinks: Serve kids and party guests cold glasses of whole milk or iced vanilla coffee.
Top Tips for Perfecting Your Baked Goods
- Use Room Temperature Ingredients: Always ensure your cream cheese, eggs, and sour cream are at room temperature before mixing. Cold ingredients create lumps in your batter.
- Avoid Overmixing Eggs: Mix on low speed when adding eggs and stop as soon as they are incorporated. Too much air in the batter causes the cheesecake to rise and crack as it cools.
- Cool Gradually: Letting your baked cheesecake cool slowly inside the turned-off oven prevents drastic temperature shocks that cause surface cracking.
- Use a Warm Knife for Slicing: Dip a sharp knife into hot water and wipe it clean with a paper towel between every cut for picture-perfect, clean slices.
Storing and Reheating Tips
- Storage: Keep leftover cheesecake covered in an airtight container or wrapped in plastic wrap in the refrigerator for up to 5 to 6 days.
- Freezing: You can freeze the baked, unfrosted cheesecake! Wrap the cooled cake tightly in plastic wrap and aluminum foil, then freeze for up to 2 months. Thaw in the fridge overnight before adding cherry topping.
- Reheating: Baked cheesecakes should always be served cold or slightly chilled. Do not microwave or heat in an oven, as heat will melt the cream cheese structure!
Frequently Asked Questions
Why did my Black Forest Cheesecake crack on top?
Cracks are typically caused by overmixing the eggs, overbaking, or cooling the cake too quickly. Following a slow cooling process inside the turned-off oven helps ensure a smooth top.
Can I use fresh cherries for a Black Forest Cheesecake?
Yes! You can easily make a homemade topping by simmering 2 cups of pitted fresh or frozen cherries with ¼ cup sugar, 1 tablespoon lemon juice, and a cornstarch slurry until thickened.
Can I make a Black Forest Cheesecake in advance?
Absolutely! A Black Forest Cheesecake actually tastes best when made a day in advance, giving the chocolate flavors time to meld while setting in the refrigerator overnight.
Baking an extraordinary, bakery-style dessert at home is simple when you have the right recipe. This incredible chocolate bake combines velvety cocoa cream cheese with sweet, juicy cherries and a crunchy cookie crust to create a dessert that delights everyone at the table. Whether you are hosting a holiday dinner, celebrating a milestone birthday, or simply satisfying a sweet craving, this classic treat is guaranteed to impress. Grab your springform pan and start baking today!