
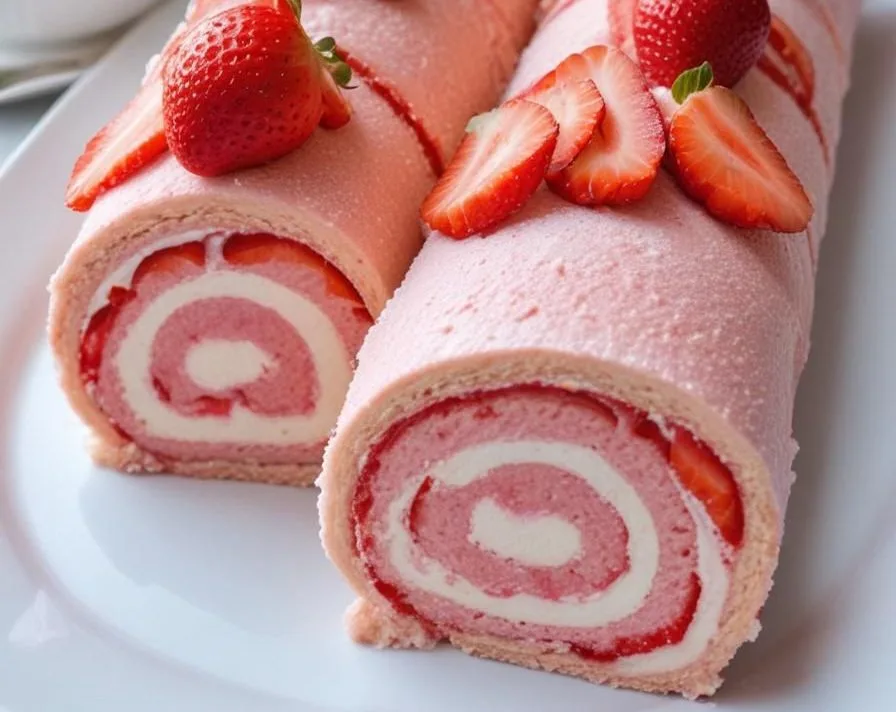
Sweet, chewy, vibrant, and packed with authentic berry sweetness, these homemade fruit rolls are the ultimate guilt-free snack for adults and kids alike! There is something purely delightful about unrolling a thin strip of natural fruit leather and taking that first chewy, flavor-packed bite. Fun fact: the concept of drying fruit purees into thin, portable sheets stretches back centuries as an ancient technique for preserving summer harvests long into the cold winter months!
If you want to skip artificial dyes, high-fructose corn syrup, and plastic packaging, making your own Strawberry Roll Up at home is an absolute game-changer. This simple recipe relies on real berries, minimal effort, and standard kitchen equipment to create a wholesome treat that packs perfectly into lunchboxes or gym bags. Preparing the fruit puree takes under ten minutes of active prep, leaving your oven to do the slow dehydrating work effortlessly. If you loved our reader-favorite strawberry banana smoothie recipe or Coconut Lime Chia Pudding Bars, this chewy, fruit-forward snack offers that exact same burst of summer flavor in a fun, portable form. Pull out your blender, line a baking sheet, and let’s turn fresh strawberries into chewy snack magic!
What is Strawberry Roll Up?
Have you ever unrolled a sweet snack tape and wondered who decided fruit should be flattened, dried, and rolled up like a tiny yoga mat? Is it a candy, a healthy snack, or just edible origami? The name Strawberry Roll Up comes straight from the fun, interactive way you peel, unroll, and enjoy this classic fruit leather! My uncle used to grab three of these homemade strips straight off the drying tray every time he visited, proving that age-old wisdom right: the way to a man’s heart is through his stomach. Ready to taste the difference that real fruit makes over store-bought versions? Fire up your blender and let’s get rolling!
Why You’ll Love This Chewy Homemade Fruit Leather
- Pure Real Fruit Flavor: The main highlight of this recipe is the bold, naturally sweet strawberry taste that concentrates into a rich, chewy strip without artificial colors or preservatives.
- Budget-Friendly Snacking: Pre-packaged organic fruit snacks from the grocery store carry high price tags, but crafting your own Strawberry Roll Up batch at home costs a fraction of the price using fresh or frozen berries.
- Customizable Sweeteners & Add-Ins: You control the ingredients! Add a drizzle of raw honey, a squeeze of fresh lemon juice, or even a sprinkle of chia seeds for extra texture and natural energy.
Much like our popular chewy blueberry fruit leather bars, this oven-baked treat gives you maximum fruit goodness with zero fuss. Grab your strawberries and try making a batch today!
How to Make Strawberry Roll Up
Quick Overview
Making fruit rolls at home is surprisingly easy and rewarding for cooks of any skill level. By blending ripe berries into a velvety smooth puree and slowly dehydrating it on a low setting in your oven, you transform liquid fruit into pliable, chewy sheets. With only 10 minutes of active prep time and simple step-by-step instructions, you can stock your pantry with healthy, delicious snacks for the entire week.
Key Ingredients
- Fresh or Frozen Strawberries: 4 cups, hulled and sliced (if using frozen berries, thaw completely first).
- Honey or Maple Syrup: 2 to 3 tablespoons, adjusted to taste based on the natural sweetness of your berries.
- Fresh Lemon Juice: 1 tablespoon, to balance sweetness and preserve the bright red color.
- Vanilla Extract (Optional): ½ teaspoon for an extra layer of warm, sweet flavor.
Step-by-Step Instructions
- Puree the Fruit Base: Preheat your oven to its lowest temperature setting, ideally between 140°F and 170°F (60°C to 75°C). Line a large rimmed baking sheet with a silicone baking mat or high-quality parchment paper. In a high-speed blender, combine 4 cups sliced strawberries, 2 tablespoons honey, 1 tablespoon fresh lemon juice, and vanilla extract. Blend on high for 1 to 2 minutes until smooth and silky.
- Spread on the Baking Sheet: Pour the strawberry puree onto the lined baking sheet. Using an offset spatula, spread the mixture evenly across the tray to about ⅛-inch thickness. Ensure the center is slightly thinner than the edges, as the edges tend to dry faster in the oven.
- Dehydrate and Roll: Place the baking sheet in the preheated oven and bake for 3 to 4 hours (or up to 5 hours depending on oven temperature and humidity). The fruit leather is done when it is firm to the touch, smooth, and no longer sticky in the middle. Remove from the oven and cool completely. Once cool, peel the sheet off the mat, place it onto a sheet of wax or parchment paper, cut into long strips using a pizza cutter, and roll them up tightly!
What to Serve With This Portable Berry Snack
Pair your homemade fruit roll-ups with these tasty, well-balanced meal and snack ideas:
- Creamy Yogurt Dips: Unroll and dip your fruit strips into Greek vanilla yogurt or coconut yogurt for a delicious contrast of textures.
- Cheese and Nut Boards: Pair with sharp cheddar slices, creamy brie, toasted almonds, or walnuts on a sweet and savory snack platter.
- Lunchbox Sides: Pack alongside turkey pinwheel wraps, crunchy veggie sticks, and hummus for a complete, kid-friendly school lunch.
- Refreshing Drinks: Enjoy during outdoor afternoon breaks with an iced green tea, sparkling mineral water, or a cold glass of lemonade.
Top Tips for Perfecting Your Dehydrated Fruit Treats
- Spread the Puree Evenly: Spreading the fruit puree at a uniform ⅛-inch thickness prevents uneven drying where edges become brittle while the center remains wet.
- Keep Oven Temperatures Low: High heat will bake or burn the fruit puree rather than dehydrate it. Keep your oven set as low as possible, leaving the door cracked slightly with a wooden spoon if needed.
- Adjust Sweetness to Taste: Taste your raw puree before drying! If your strawberries are early-season or tart, feel free to add an extra tablespoon of sweetener.
- Use a Silicone Mat: Silicone baking mats make peeling cooled fruit leather completely effortless without tearing.
Storing and Reheating Tips
- Storage: Store rolled fruit strips wrapped in parchment paper inside an airtight glass container or zip-top bag at room temperature for up to 3 weeks.
- Refrigeration: For longer shelf life, store the sealed container in the refrigerator for up to 3 months to maintain maximum chewiness and freshness.
- Freezing: You can freeze wrapped rolls in a freezer-safe bag for up to 6 months. Simply thaw at room temperature for 15 minutes before unrolling.
- Reheating: Fruit leather should not be reheated in a microwave or oven, as heat will melt or crisp the structure. Enjoy at room temperature!
Frequently Asked Questions
Why is my Strawberry Roll Up still sticky after baking?
If your Strawberry Roll Up remains wet or sticky in the middle, it simply needs more time in the oven. Return it to low heat for 30-minute increments until firm to the touch.
Can I make a Strawberry Roll Up using a food dehydrator?
Absolute! Pour your strawberry puree onto non-stick dehydrator trays and dry at 135°F (57°C) for 6 to 8 hours until pliable and firm.
Can I use other fruits with this Strawberry Roll Up recipe?
Yes! You can easily combine strawberries with apples, bananas, raspberries, or mangoes to create custom blended fruit rolls using the exact same method.
Making healthy, delicious snacks at home doesn’t require complex ingredients or professional dehydrators. With fresh strawberries, a touch of natural sweetener, and a low-and-slow oven bake, you can create chewy fruit strips that put store-bought versions to shame. Whether you are packing school lunches, prepping outdoor trail snacks, or simply satisfying an afternoon sweet tooth, this easy recipe delivers pure berry perfection every single time. Blend up a batch today and enjoy the natural taste of real fruit!