
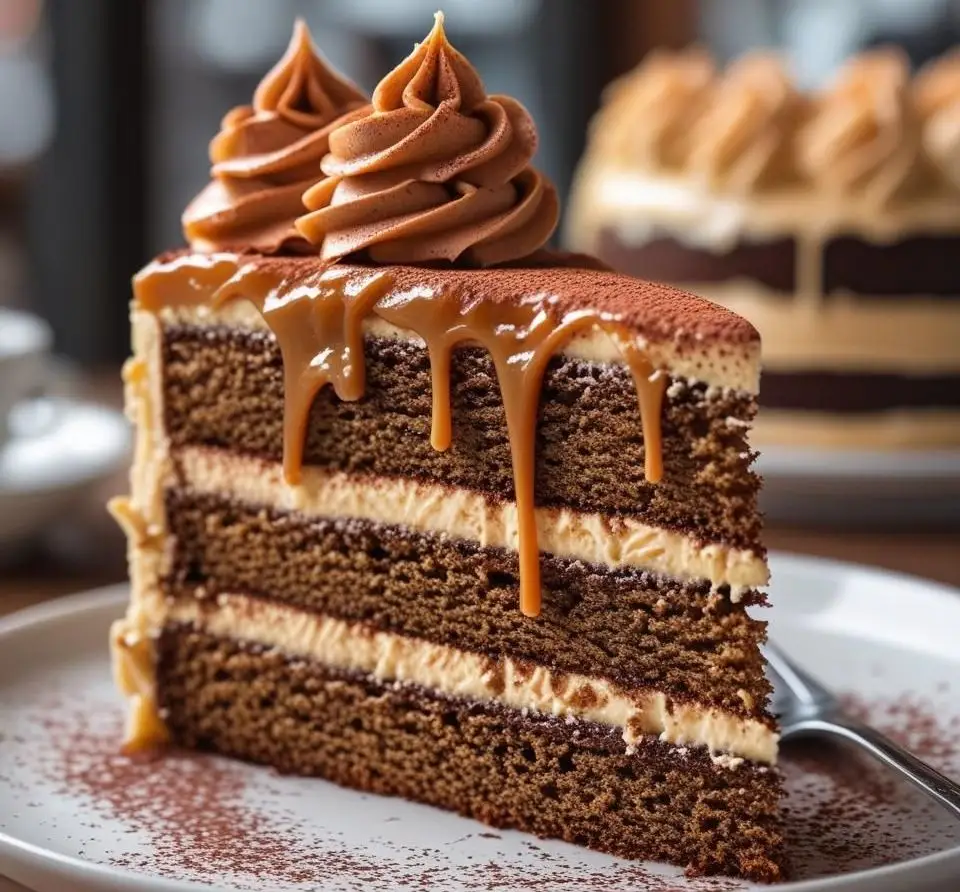
Baking a fresh Caramel Coffee Layer Cake is the absolute ultimate way to spoil your friends and family with a deeply aromatic, rich, and indulgent centerpiece. Imagine sinking your fork into tender espresso-infused sponge layers cushioned with silky espresso buttercream and dripping with sweet salted caramel. Furthermore, as a result of that heavenly balance between bold espresso, rich butter, and sweet golden caramel, this gorgeous dessert becomes an instant crowd-pleaser for cake lovers of all ages!
Did you know that pairing coffee with caramel dates back centuries to traditional European coffee houses? Specifically, baristas noticed that rich caramel natural sugars balanced the deep, bitter notes of dark roasted coffee beans perfectly. Consequently, master bakers brought this classic flavor duo to layer cakes, creating an iconic dessert pairing that remains a favorite worldwide.
What makes this Caramel Coffee Layer Cake special is its surprisingly straightforward process. Specifically, it requires only 25 minutes of active prep time and delivers universal family-friendly appeal for birthdays, weekend celebrations, or holiday gatherings. In fact, you do not need master pastry skills to achieve neat cake layers. Instead, with simple pantry staples, brewed espresso, and basic round cake pans, you can bake a bakery-worthy masterpiece effortlessly.
Additionally, if you loved our popular Mini Chocolate Mousse Cakes or Black Forest Cheesecake, you will certainly adore the warm, aromatic coffee profile of this spectacular bake. Therefore, preheat your oven and let us bake an unforgettable cake today!
What is a Caramel Coffee Layer Cake and Its Story?
Ever wondered how the Caramel Coffee Layer Cake earned its mouthwatering name? Is it because stacking espresso-infused cake layers with silky buttercream and sweet caramel delivers pure bliss in every single bite? Absolutely!
For instance, a funny kitchen story tells of a home baker who accidentally knocked her morning shot of espresso right into her vanilla cake batter while melting caramel on the stove. Rather than throwing out the ingredients, she baked the layers anyway and stacked them with warm caramel. Consequently, her family was so amazed by the incredible coffee flavor that they demanded it for every birthday! As the classic saying goes, “the way to a man’s heart is through his stomach.” Therefore, serving a slice of this Caramel Coffee Layer Cake will win over everyone at your table. Grab your mixing bowls and try this easy recipe today!
Why You’ll Love This Caramel Coffee Layer Cake Recipe
Baking a Caramel Coffee Layer Cake fills your whole house with irresistible coffee and sweet sugar aromas. For example, you will instantly smell fresh espresso, rich whipped butter, sweet vanilla, and warm buttery caramel. Here are three key reasons why this recipe will quickly become your new favorite dessert:
- Bold Coffee-Caramel Fusion: First, the main highlight of this dessert is the contrast between deep espresso sponge and sweet golden salted caramel.
- Massive Bakery Savings: Second, ordering custom layer cakes at artisan bakeries gets expensive quickly. However, baking your own Caramel Coffee Layer Cake at home uses basic pantry items for a fraction of store prices.
- Silky Espresso Buttercream: Finally, coating soft coffee sponge layers in smooth espresso buttercream creates a luxurious texture that satisfies every craving.
Additionally, if you enjoyed our rich Red Velvet Buttermilk Cake, you will love this aromatic espresso alternative. Consequently, gather your ingredients and treat your family to a fresh slice tonight!
How to Make Caramel Coffee Layer Cake Step-by-Step
Quick Overview
This easy Caramel Coffee Layer Cake recipe pairs soft espresso cake layers with a silky coffee buttercream and rich salted caramel drip. Overall, it delivers a deeply satisfying balance of rich cocoa, bold espresso, and sweet caramel. Best of all, with only 25 minutes of active prep time and 30 minutes of baking time, you can prepare a spectacular layer cake effortlessly!
Key Ingredients for Caramel Coffee Layer Cake
Gather these simple ingredients before heating your oven:
- All-Purpose Flour: 2½ cups all-purpose flour (sifted)
- Baking Powder & Baking Soda: 2 teaspoons baking powder plus ½ teaspoon baking soda
- Salt: ½ teaspoon fine sea salt
- Granulated Sugar: 1½ cups granulated white sugar
- Unsalted Butter: 1 cup unsalted butter (softened at room temperature)
- Eggs: 3 large eggs at room temperature
- Vanilla Extract: 2 teaspoons pure vanilla extract
- Strong Espresso or Coffee: ¾ cup strong brewed espresso (cooled to room temperature)
- Whole Milk: ½ cup whole milk
- Salted Caramel Sauce: 1 cup store-bought or homemade thick salted caramel sauce
- Powdered Sugar: 4 cups powdered sugar (sifted, for buttercream)
- Unsalted Butter for Frosting: 1½ cups unsalted butter (softened)
- Instant Espresso Powder: 2 tablespoons instant espresso powder (dissolved in 2 tablespoons warm cream)
Step-by-Step Instructions
- Prepare Oven and Pans: First, preheat your oven to 350°F (175°C). Grease two 9-inch round cake pans and line the bottoms with parchment paper circles.
- Whisk Dry Ingredients: Next, whisk together all-purpose flour, baking powder, baking soda, and sea salt in a medium bowl.
- Cream Butter and Sugar: In a large bowl, beat 1 cup softened butter and granulated sugar for 3 minutes until light and fluffy.
- Add Wet Ingredients: After that, add eggs one at a time, followed by vanilla extract. Beat on medium speed until fully combined.
- Alternate Flour and Coffee: Alternate adding dry flour mixture, cooled espresso, and whole milk into batter, starting and ending with flour. Stir gently just until combined.
- Bake Cake Layers: Divide batter evenly between prepared pans. Then bake at 350°F (175°C) for 28 to 32 minutes until a toothpick inserted into the center comes out clean. Afterwards, cool completely on wire racks.
- Make Coffee Buttercream: Beat 1½ cups softened butter for 2 minutes. Gradually add powdered sugar and dissolved espresso mixture. Beat on high speed for 3 minutes until light and fluffy.
- Assemble and Decorate: Place one cooled cake layer on a plate. Spread 1 cup of buttercream over top and drizzle with 3 tablespoons caramel sauce. Place second cake layer on top, frost the top and sides with remaining buttercream, drizzle with remaining caramel, and serve!
Best Pairings for Espresso Caramel Layer Cakes
Turn your slice of cake into a full coffeehouse treat with these complementary pairing ideas:
- Hot Cappuccino or Latte: First, a fresh cup of hot cappuccino or vanilla latte enhances the bold espresso notes.
- Cold Brew Coffee: Next, serving a slice alongside an ice-cold glass of dark cold brew coffee provides a refreshing balance.
- Vanilla Ice Cream: Meanwhile, a scoop of rich vanilla bean ice cream adds a cool, creamy contrast to warm caramel.
- Toasted Pecans: Finally, side bowls of toasted pecans or walnuts add extra buttery crunch to every single bite.
Top Tips for Perfecting Caramel Coffee Layer Cake
Baking a bakery-quality Caramel Coffee Layer Cake at home is simple when you follow these 7 practical secrets:
- Use Real Brewed Espresso: First, use real dark espresso or high-quality instant espresso powder. Otherwise, weak drip coffee will not deliver enough coffee flavor.
- Cool Coffee Completely: Second, always let hot brewed espresso cool to room temperature before adding to batter. Indeed, hot liquid cooks eggs prematurely.
- Level Your Cake Layers: Next, trim domed cake tops flat using a serrated bread knife before frosting. Consequently, your stacked cake stays stable and straight!
- Chill Layers Before Assembly: In addition, wrap cooled cake layers in plastic and chill in the fridge for 30 minutes. As a result, chilling prevents crumbs from tearing into frosting.
- Thicken Your Caramel Drip: Furthermore, use thick, cooled caramel sauce for decorating. On the other hand, warm caramel melts buttercream instantly.
- Do Not Overmix Batter: Next, fold dry ingredients into wet batter gently. Because of this, your cake crumb remains light and tender rather than dense.
- Sift Powdered Sugar: Finally, sift powdered sugar before beating buttercream. Consequently, your coffee frosting stays completely lump-free and silky smooth.
Storing and Reheating Guidelines
Keep your sweet layer cake fresh using these simple storage recommendations:
- Room Temperature Storage: Keep whole or sliced Caramel Coffee Layer Cake under a cake dome at room temperature for up to 3 days.
- Refrigeration: Store leftover cake in an airtight container in the refrigerator for up to 6 days due to butter content.
- Serving Chilled Cake: However, bring chilled slices to room temperature for 20 minutes before serving so buttercream softens nicely.
- Freezing Cake Layers: Wrap un-frosted cake layers tightly in plastic wrap and aluminum foil, then freeze for up to 2 months. Afterwards, thaw overnight in the fridge before decorating.
Frequently Asked Questions
Can I make a Caramel Coffee Layer Cake without real espresso?
Yes! Specifically, you can substitute liquid espresso with 2 tablespoons of instant coffee granules dissolved in ¾ cup of warm milk.
How do I stop caramel from sliding off my Caramel Coffee Layer Cake?
In fact, chilling your frosted cake in the fridge for 15 minutes before adding caramel ensures the buttercream is firm enough to hold the drip.
Can I make this Caramel Coffee Layer Cake ahead of time?
A: Absolutely! For example, you can bake the cake layers 2 days in advance and keep them tightly wrapped at room temperature before frosting.
Ultimately, baking a homemade Caramel Coffee Layer Cake from scratch is the best way to bring rich, aromatic delight to your home in under an hour. Because it pairs soft espresso sponge layers with silky coffee buttercream and sweet salted caramel, this simple recipe delivers maximum impact with minimal effort. Therefore, put these 7 baking secrets into practice today, grab your cake pans, and enjoy every delicious slice!